
WELCOME TO GMS ACCOUNTING ONLINE HELP
The help you need at your fingertips.
You are here: Tools > Bank Reconciliation
Bank Reconciliation
Function
Prepares a Bank Reconciliation for all cash accounts in the GMS Accounting System.
Things You Should Know
Prepares a Bank Reconciliation for all cash accounts in the GMS Accounting System.
Things You Should Know
- Importing the bank file is the most efficient way to do the bank reconciliation and if a bank download is available, it should be utilized every month.
- If cleared Checks, Deposits or Journal Entries are not removed and Bank Rec is closed out, those entries that were check marked to be cleared will still be checked when returning to the program.
- When clearing Journal Entries, if the entry is for two different accounts, such as a debit to cash account 10000 and a credit to cash account 10100, the system will only mark cleared the side of the entry for the account you are reconciling at that time.
- Please see the Bank Rec Utility section at the bottom of this Bank Reconciliation chapter for features specifically designed for organizations just starting with GMS.
Ending Date: Click on and choose the ending date of the month the reconciliation is being prepared for.
GL Account: Click on and choose the GL Cash Account.
Ending Statement Balance: Enter the ending statement balance as it appears on the bank statement. Once this is entered, it will be retained. If you import the bank file, it will automatically fill this amount in.
GL Account: Click on and choose the GL Cash Account.
Ending Statement Balance: Enter the ending statement balance as it appears on the bank statement. Once this is entered, it will be retained. If you import the bank file, it will automatically fill this amount in.
Bank Reconciliation Tab
Click on the print button to print the Bank Reconciliation for the Month and Account selected. This should be the last step done.
Note: The GL balance of the account being reconciled will show on this report with the variance when compared to the Ending Book Balance.

Place a checkmark in this box to include all outstanding deposits, checks and general journal entries

If auto PDF report has NOT been setup for Bank Reconciliation, a copy of the Bank Reconciliation will be saved in the c:\GMSACTG.NET\GMSSYS folder on the computer it was printed on. Clicking on this button will open that folder and display prior reports.
Deposits Tab
Clear (Y/N): Click on the box to mark a deposit as cleared. If a Deposit was erroneously cleared and the Remove Cleared Deposits has not been done, click on this field and the checkmark will be removed, making the item outstanding once again.
Clear (Y/N): Click on the box to mark a deposit as cleared. If a Deposit was erroneously cleared and the Remove Cleared Deposits has not been done, click on this field and the checkmark will be removed, making the item outstanding once again.
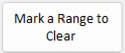
This function can be used to mark a range of Cash Receipt (CR) batch numbers. Clicking on the button will open another box asking for the beginning and ending CR batch number to be marked.

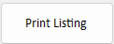
This function can be used to print a listing of cleared and outstanding deposits. Cleared deposits will appear at the beginning of the report and the outstanding deposits will appear at the end.

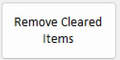
This function can be used after verifying that all the proper deposits have been cleared and the balance of the outstanding deposit is the correct figure used to complete the bank reconciliation. This step will remove any deposits with a checkmark in the Clear (Y/N) field in the grid.

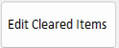
This function is used if a deposit was accidentally removed as cleared, but the deposit had not cleared the bank. Enter the Batch number, click OK, then click Save. This will place the deposit back in the grid.
Checks Tab
Clear (Y/N): Click on the box to mark a check as cleared. If a Check was erroneously cleared and the Remove Cleared Checks has not been done, click on this field and the checkmark will be removed, making the item outstanding once again.
Clear (Y/N): Click on the box to mark a check as cleared. If a Check was erroneously cleared and the Remove Cleared Checks has not been done, click on this field and the checkmark will be removed, making the item outstanding once again.

This function can be used to mark a range of Cash Disbursement (CD) batch numbers. Clicking on the button will open another box asking for the beginning and ending CD batch numbers to be marked.
This function can be used to print a listing of cleared and outstanding Checks. Cleared checks will appear at the beginning of the report and the outstanding checks will appear at the end.
This function can be used after verifying that all the proper checks have been cleared and the balance of the outstanding checks is the correct figure used to complete the bank reconciliation. This step will remove any checks with a checkmark in the Clear (Y/N) field in the grid.
This function is used if a check was accidentally removed as cleared, but the check had not cleared the bank. Enter the check number or a range of check numbers, click OK, then click Save. This will place the check(s) back in the grid.
Journal Entries Tab
Note: If you issue payroll checks, the net pay amount of those checks will also be included in the payroll journal entry reflected in this tab. Make sure you clear the payroll journal entry to avoid duplication. The automatic payroll journal entries that start with the "PR_", "Payroll" "PR#", "Payroll PR#" or "Payroll PR #" will not appear.
Clear (Y/N): Click on the box to mark a GJ as cleared. If a GJ was erroneously cleared and the Remove Cleared GJ’ has not been done, click on this field and the checkmark will be removed, making the item outstanding once again.

This function can be used to mark a range of General Journal (GJ) batch numbers. Clicking on the button will open another box asking for the beginning and ending GJ batch number to be marked.

This function can be used to print a listing of cleared and outstanding Journal entries. Cleared GJ’s will appear at the beginning of the report and the outstanding GJ’s will appear at the end.

This function can be used after verifying that all the proper GJ’s have been cleared and the balance of the outstanding checks is the correct figure used to complete the bank reconciliation. This step will remove any GJ’s with a checkmark in the Clear (Y/N) field in the grid.

This function is used if a GJ was accidentally removed as cleared, but the GJ had not cleared the bank. Enter the GJ document number or a range of GJ document numbers, click OK, then click Save. This will place the GJ’s back in the grid.
Should a manual adjustment to the Bank Reconciliation need to be made, use this option to record the entry. This will typically be used for an item that cleared the bank but was not entered into the accounting system and will be entered in the following month.
Import Matrix Tab
Downloading the bank file: If available, download the monthly transactions in a csv or xls format from your bank’s website. If a csv format is not listed, see if one of their formats can be downloaded and saved in a csv format.
GMS recommends that when you save the file, put the GL code and month as part of the name, i.e. GL10000 May bank download.csv. You may want to store them all in a folder called Bank downloads.
After downloading the file, open it and look at all the fields. If any of the fields, such as the date field, is not in a date format, make sure you format it as a date, with an xx/xx/xx format.
Things You Should Know
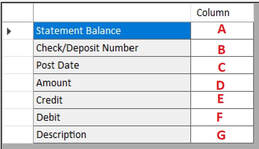
Note: When you are going to import for the first time, after downloading your bank file, open it up. Make a note of which column and field the ending statement balance is listed. Then make a note of which column the following are in:
Check/Deposit Number
Post Date
Amount
Credit
Debit
Description
If your bank is already listed, choose that bank. Edit and change any of the fields to match your bank file format and save it.
If your bank name is not listed, see if the format of your bank’s download matches any of the bank formats listed. If so, you can change the bank name to the bank that you use.
If your bank’s format does not match one that is listed, you can either modify one that is listed or add a new bank name and designate which columns and fields the information requested in the grid is located.
Setting up a new format:
Downloading the bank file: If available, download the monthly transactions in a csv or xls format from your bank’s website. If a csv format is not listed, see if one of their formats can be downloaded and saved in a csv format.
GMS recommends that when you save the file, put the GL code and month as part of the name, i.e. GL10000 May bank download.csv. You may want to store them all in a folder called Bank downloads.
After downloading the file, open it and look at all the fields. If any of the fields, such as the date field, is not in a date format, make sure you format it as a date, with an xx/xx/xx format.
Things You Should Know
- Look in the bank file to see if you have several records at the top of the file that represent daily opening and balance information. All of this should be deleted prior to importing except for the balance at the end of the month. If you wish to delete all of those top records, you can just type in your ending balance from the Statement.
- In the bank file, if any records in a date or dollar amount field have #NAME? listed, remove that field (leaving all remaining fields in that record) since it can’t be converted and will give you an error message.
- If you are using a bank format that is listed in the combo box, make sure you delete any blank records at the beginning of your bank download file.
- If you click on import more than once for the same cutoff date you will receive the message "the bank file has previously been imported for the current month. Are you sure you want to import it again?"
Note: When you are going to import for the first time, after downloading your bank file, open it up. Make a note of which column and field the ending statement balance is listed. Then make a note of which column the following are in:
Check/Deposit Number
Post Date
Amount
Credit
Debit
Description
If your bank is already listed, choose that bank. Edit and change any of the fields to match your bank file format and save it.
If your bank name is not listed, see if the format of your bank’s download matches any of the bank formats listed. If so, you can change the bank name to the bank that you use.
If your bank’s format does not match one that is listed, you can either modify one that is listed or add a new bank name and designate which columns and fields the information requested in the grid is located.
Setting up a new format:
- Enter the new bank name
- Click on Edit
- A. Enter the column for the Ending Statement Balance
- B. Enter the column for the Check/Deposit number
- C. Enter the column for the Posting Date
- D. For the Amount field, use the applicable example that matches your bank's file:
--If the debits and credits are in one column and both have positive numbers, there should be another column that shows debit or credit. For this put both column letters with a comma in between, i.e. D, F.
--If the debits and credits are in one column with positive and negative dollar amounts, just enter the one column letter.
--If the debits and credits are in different columns, leave the field next to Amount blank and enter the applicable column letter for each next to Credit (E.) and Debit(F.). - G. Enter the column for the Description of the transaction
- Click on Save edit.
File Name: This field will be populated after selecting the bank file.
Open: Click on the Open button and find the bank file to be imported.
Import: Click on the Import button, and it will import the data. When the data is imported, it will give a list of any deposits, checks or miscellaneous debits that were found in the bank file that were not found in the GL.
It is very important to print those out for reference during the reconciliation, since they are not saved in the database.
Note: If importing a bank file using the same cutoff date previously used a message saying you are about to do so will appear.
Note: if you use supplement #405 A/P Direct Deposit, you will notice on the listing of miscellaneous items found in bank file but not on the GL that the total amount of each A/P direct deposit file will be listed. The description of these amounts should include ACH Settlement. These items can be ignored since you know they cleared the bank on the settlement date. This of course is assuming the date is in your current month reconciliation.
Bank Rec Utility (Must be turned “on” in the Tools, Organization, Default GL codes) Note: If this option is chosen, it will be accessible when you select Bank Reconciliation on the Tools menu.
This Bank Reconciliation Utility is specifically designed to help clients that are starting to use the GMS Accounting and Financial Management System. It gives the ability to build the list of outstanding Deposits, Checks and Journal Entries prior to the beginning of entering live data into the accounting system.
Things You Should Know
- The items added through this utility have no effect on the general ledger cash balances. This information is only stored in the tables used to prepare the bank reconciliation(s).
- Once all necessary items have been added through this utility and the bank reconciliation ties to the General Ledger, go to Tools\Organization\Default GL Codes and uncheck the Bank Rec Utility box. This will prevent accidently opening the utility and making a change that could have an adverse effect on your bank reconciliation.
Operating Instructions
Ending Date: Select the date the outstanding lists are being created.
GL Account: Select the GL cash account for the outstanding lists.
Deposits Tab

Utility Batch #: This field automatically numbers each deposit batch. This field cannot be edited. Each deposit utility batch should equal the amount of an entire deposit needed to account for. Do not enter each item in a deposit separately.

Date: Enter the date of the deposit.

Description: Enter an optional description in this field specific to the deposit.

Amount: Enter the amount of the deposit
Once your outstanding deposits have been entered, be sure to save.

Prints a listing of deposits entered.

This will post the deposit(s) to the bank reconciliation tables.
Checks

Check #: Enter the outstanding check number you are adding.

Date: Enter the date of the outstanding check.

Payer: Enter the payers name the check was issued to.

Amount: Enter the amount of the outstanding check.
Once your outstanding checks have been entered, be sure to save.

Prints a listing of checks entered.

This will post the checks(s) to the bank reconciliation tables.
Journal Entries
Note: an example of a journal entry needed in this utility may be for an online payment to a vendor that had not cleared the bank as of the specified date.
Note: an example of a journal entry needed in this utility may be for an online payment to a vendor that had not cleared the bank as of the specified date.

Utility Doc #: This field automatically numbers each document on the Journal Entries tab. This field cannot be edited.

Date: Enter the date of this entry.

Description: You can enter an optional description in this field specific to the entry.

Debit: If this entry is a debit to the specified cash account enter the amount in this column.

Credit: If this entry is a credit to the specified cash account enter the amount in this column.
Once the outstanding GJ’s have been entered, be sure to save.
Prints a listing of GJ’s entered.
This will post the GJ’s to the bank reconciliation tables.
