WELCOME TO GMS ACCOUNTING ONLINE HELP
The help you need at your fingertips.
You are here: General Ledger > G/L Supplements > #620 Cash Receipt Import
#620 Cash Receipt Import
Function
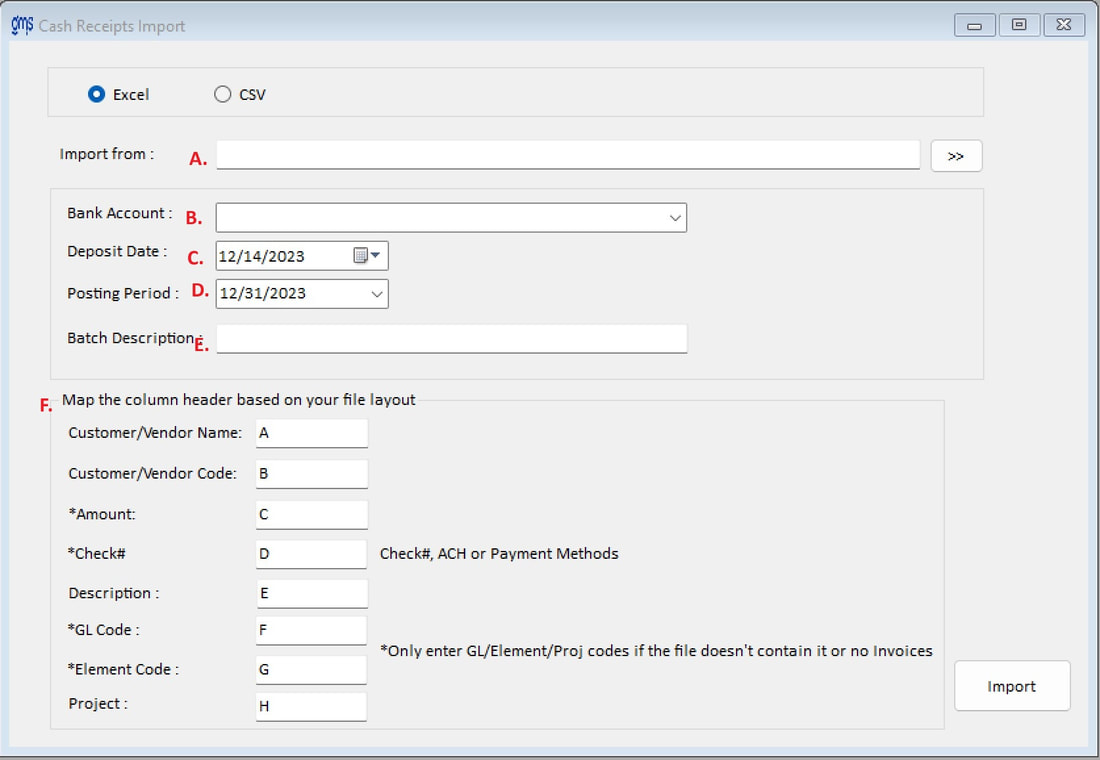
The Cash Receipts Import supplement allows you to import Excel or CSV files to form a CR batch.
Things You Should Know
If you wish to import CR entries, the following information needs to be in the file:
Customer/Vendor name, Customer/Vendor Code, Amount, Check #, Description, GL Code and Element code or Project.
Should you import a file containing inactive elements/GL codes/Projects, the process will be stopped, and a list provided of the inactive codes.
Instructions:
A. Browse to find the file to be imported.
B. Select the GL bank account for the batch.
C. Enter the date of the deposit.
D. Select the posting period for the deposit.
E. Enter the description for the CR batch
F. Map the columns in the file:
Customer/Vendor Code & Name: Enter the column code that corresponds to the columns in the import file. The Customer Name/Vendor code is a mandatory column if using Supp #336 Accounts Receivable.
Amount: Enter the column code that corresponds to the column in the import file containing the amount. The Amount is a mandatory column.
Check #: Enter the column code that corresponds to the column in the import file containing the Check #/ACH. The Check # is a mandatory column.
Description: Enter the column code that corresponds to the column in the import file containing the description.
GL Code/Element Code: Enter the column code that corresponds to the column in the import file containing the GL Code and the Element code. If the file does not contain this information, enter the GL Code and Element code in the appropriate field.
Project: Enter the column code that corresponds to the column in the import file containing the Project code if the CR is to be coded to the project level.
Import: Click to import the file.
The message “The General Journal Batch has been imported. Please check the Cash Receipt Register to make sure all data has imported correctly” will appear. Click OK.
The CR Batch will appear on the screen. Check the batch, edit if needed, and Post.


